
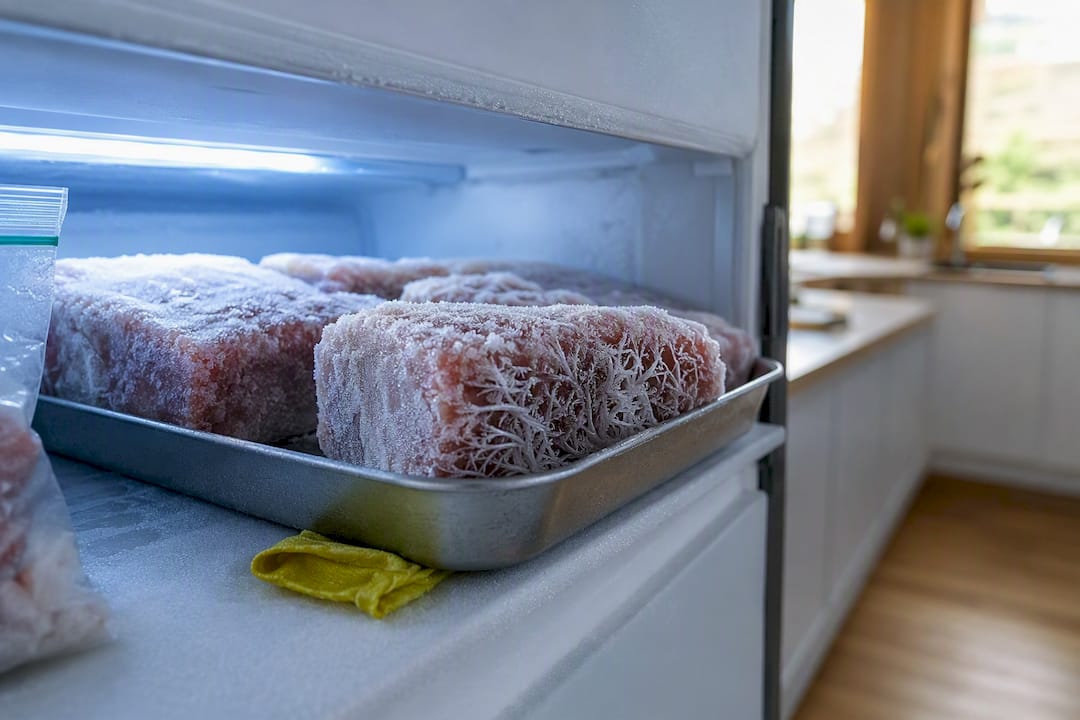
The most reliable way to prevent freezer burn without plastic is airtightness, not the material itself: wide-mouth glass jars, stainless steel tins, reusable silicone pouches, and beeswax wraps used the right way all work when air and moisture are kept off the food. Pre-chilling, leaving headspace for liquids, and flash-freezing small pieces matter more than any single container choice. The food-specific steps below show exactly how.
TL;DR:
- Proper technique, including pre-chilling and flash-freezing small portions, is more important than container material in preventing freezer burn.
- Glass, stainless steel, and silicone are recommended because they are inert and do not leach microplastics or chemicals into food, unlike some plastics.
- Freezing foods in flat layers and leaving headspace in jars helps even freeze and reduces ice crystal formation, extending shelf life.
- Manual air removal methods, such as pressing out air or partial freezing before sealing, provide nearly the same benefit as vacuum sealing for most household needs.
- Label all frozen items with date and contents and treat the freezer as short-term storage to prevent quality loss and freezer burn.
Table of Contents
- What causes freezer burn, and how do you stop it without plastic?
- Which plastic-free materials actually work, and what are the trade-offs?
- How do you freeze specific foods without freezer burn?
- How do you get the air out without a vacuum sealer?
- How long can you keep food frozen, and how should you label it?
- What does the evidence actually say about plastic-free freezing?
- Our take on plastic-free freezing
- Plastic-free freezer tools that make this easier
- Sources
What causes freezer burn, and how do you stop it without plastic?
Freezer burn happens when moisture escapes from food and turns straight into ice crystals on the surface, usually on freezer walls or packaging rather than inside a sealed jar. The food isn’t spoiled. It’s dehydrated at the surface, which is why burnt patches look grey, leathery or frosted. Stop air reaching the surface and you stop the problem, regardless of what the container is made from.
Here’s a quick shortlist for matching the food to the fix:
- Glass jars or tubs — best for soups, sauces, stocks and stewed fruit. Caveat: only use straight-sided, wide-mouth jars, and never fill past the shoulder.
- Stainless steel tins — best for casseroles, bolognese, curries and anything you’ll reheat whole. Caveat: not see-through, so labelling matters more.
- Reusable silicone pouches — best for marinated meat, flash-frozen fruit and single portions. Caveat: seals wear out after heavy use, so check them periodically.
- Beeswax or plastic-free wax wraps — best for bread, cheese and short-term parcels. Caveat: not fully airtight, so pair with a rigid container for anything staying frozen more than a few weeks.
- Ice-tray freezing — best for herbs, stock, purées and baby food portions. Caveat: transfer cubes to a sealed jar once solid, or they’ll dry out fast.
You don’t need to buy anything new to start. A rinsed pasta sauce jar, an old muffin tin, or foil you’ve already used twice will do the job just as well as anything from a shop. Bread keeps best sliced and packed loosely into a tin. Leftover soup goes straight into a jar with room to spare. Herbs get chopped into an ice tray with a splash of water or oil. Small swaps, immediate results.
Which plastic-free materials actually work, and what are the trade-offs?
Not all plastic-free materials perform equally, and the differences matter once food is sitting at minus 18°C for weeks. Reports and lawsuits over recent years have raised real questions about chemicals and microplastics leaching from plastic containers over repeated freeze-thaw cycles, which is a big part of why glass, stainless steel and food-grade silicone are the materials nutritionists and food writers keep coming back to.
Evidence callout: Inert materials such as borosilicate glass and stainless steel don’t leach chemicals into food under normal conditions, whereas some plastics can shed microplastics over time, particularly with heat cycling and scratching.
Here’s how the main options stack up:
- Borosilicate glass — Handles rapid temperature swings far better than ordinary glass, though even it needs a wide mouth and straight sides. Straight-sided jars with about 3cm of headspace largely prevent the cracking that gives glass its bad reputation in freezers.
- Stainless steel — Doesn’t crack, doesn’t stain, and lasts decades, but you can’t see the contents, so it lives or dies on good labelling.
- Food-grade silicone — Flexible enough to expel air by hand, freezer-safe, and reusable hundreds of times, though seals degrade eventually and need checking.
- Beeswax wraps — Genuinely good for a few days to a couple of weeks, but they’re not designed for long-haul freezing; use them as a first layer inside a rigid container instead.
- Foil and parchment — Fine in a pinch and infinitely reusable if you rinse and dry them, but neither creates a proper seal, so they’re best paired with a tin or jar, not used alone.
Expert-approved food storage guides consistently point to the same three materials: glass, steel and silicone, precisely because they don’t interact with food chemically and they hold a seal.
How do you freeze specific foods without freezer burn?
Technique matters as much as the container. Get these steps right and the material choice becomes almost secondary.
-
Meat. Portion it first, wrap tightly in wax paper or a beeswax wrap, then place inside a rigid stainless steel tray or glass container so the wrap can’t shift. Freeze flat wherever the cut allows, since flat portions freeze faster and more evenly than lumpy ones. Label with the cut and date before it goes in.
-
Soups and sauces. Cool completely first. A hot pot straight into the freezer raises the internal temperature of everything around it and encourages ice crystals. Pour into a jar leaving roughly 3cm of headspace, since liquid expands as it freezes and a full jar under pressure is how jars crack. Leave the lid loose until the surface is solid, then tighten. For small servings, freeze stock or sauce in an ice-cube tray, then tip the frozen cubes into a jar once solid.
-
Bread. Slice it, wrap in a beeswax wrap or paper, then pack into a tin or rigid box. Bread frozen this way stays good for short-term storage; beyond that, expect the texture to suffer even with perfect wrapping.
-
Fruit. Flash-freeze pieces spread out on a tray for a couple of hours, then transfer to a jar or tin once solid. This stops berries and chopped fruit fusing into one frozen block and cuts down the surface area exposed to air.
-
Herbs. Chop and pack into ice-cube trays with water or olive oil, freeze solid, then store the cubes in a small jar. This is the single easiest plastic-free swap in the kitchen.
-
Prepared meals and casseroles. Cool fully, freeze flat in a metal tray or freezer-safe glass dish, and cover tightly. Rotate on a first-in, first-out basis so nothing gets lost at the back for eight months.
Pro Tip: Cool food in the fridge for an hour before it goes anywhere near the freezer. Skipping this step is the single biggest reason home-frozen soups and casseroles end up with ice crystals through the middle, not just on top.
For a fuller breakdown on meat specifically, freezing meat without plastic covers cut-by-cut timing in more depth.
How do you get the air out without a vacuum sealer?
You don’t need a machine to get most of the benefit a vacuum sealer gives you. A few manual techniques do the job for a fraction of the cost.
- Partial-freeze sealing for liquids. Fill a jar three-quarters full, leave the lid resting loosely, and only screw it down tight once the surface has frozen solid. This lets the liquid expand safely and creates a proper seal without trapping pressure.
- Compression in rigid containers. Pack food down firmly, press a piece of cloth or paper against the surface to push out the last air pockets, then seal the lid immediately.
- Cold-water immersion for silicone pouches. Fill the pouch, seal most of the way, then lower it into a bowl of cold water so the water pressure pushes air out through the last open corner. Zip fully before lifting it out.
- Manual air expulsion. Simply pressing a silicone pouch flat with your hands before sealing removes most of the trapped air; it won’t match a machine, but it’s close enough for anything you’ll eat within a few months.
A dedicated vacuum system earns its keep if you’re batch-cooking large volumes or freezing meat for months at a time, but for weekly meal prep, the manual methods above cost nothing and take seconds. Reusable pouches designed for this kind of repeated sealing, outlined here as everyday alternatives, tend to outlast single-use bags many times over.
Pro Tip: If a silicone pouch won’t sit flat in your freezer drawer, lay it flat on a tray to freeze solid first, then stand it upright once frozen. It’ll hold its shape and stack like a book from then on.
How long can you keep food frozen, and how should you label it?
Treating the freezer as short-term storage rather than indefinite storage is the single biggest factor in avoiding freezer burn, more so than the container you use.
As a rough guide: soups and stews hold quality for a limited time, raw meat portions and bread best consumed within short-term periods, and fruit or herb cubes last longer when air exposure is minimal. Quality drops off a cliff past those windows even in a perfect seal, because a small amount of moisture migration is unavoidable over time.
- Write the date, contents and intended use on paper tape with pencil, since biro can smear and stickers often contain plastic.
- Keep newest items at the back and oldest at the front, so nothing gets forgotten for a year.
- Open the freezer door as briefly as possible; every extra minute open lets in warm, moist air that speeds up surface ice on everything inside.
- Cosmetic freezer burn, the grey patches, is safe to eat once trimmed off or stirred into a sauce; it’s a texture and flavour issue, not a safety one.
What does the evidence actually say about plastic-free freezing?
The concern about plastic in food storage isn’t abstract. Alongside the broader scale of plastic pollution documented by environmental researchers, reporting on consumer lawsuits has surfaced real evidence of microplastics and chemical leaching from plastic containers, particularly with repeated freezing and reheating cycles. Glass, stainless steel and food-grade silicone don’t carry that risk because they’re chemically inert.
“Fill jars no more than three-quarters full and only screw the lid on tight once the food has begun to freeze.” That single habit, drawn from zero-waste cooking practice, prevents most of the cracked-jar horror stories people associate with freezing in glass.
Practitioner advice consistently lines up: cool food fully before it goes in, leave headspace, flash-freeze anything small enough to clump. None of it requires specialist equipment. What it does require is a shift away from treating single-use bags as the default, towards containers that get reused for years rather than minutes. That’s the gap most household advice glosses over, and it’s the one worth closing first.
Our take on plastic-free freezing
Most freezer burn advice online treats packaging as the whole problem, when it’s really only half of it. Technique carries the other half, and it’s the half most people skip. Cooling food fully, leaving proper headspace, flash-freezing before bagging: none of that costs anything, yet it does more to stop freezer burn than swapping one container material for another.
The conventional advice also oversells vacuum sealers as necessary kit. They help with volume, but a jar filled three-quarters and left to partially freeze before the lid goes on tight achieves nearly the same result for nothing. Where I’d push back hardest is on beeswax wraps being sold as a full freezer solution. They’re genuinely useful for short-term jobs like bread and cheese, but pair them with a rigid container for anything going in for more than a couple of weeks, or moisture will still find its way out.
Start with what you already own. A washed jam jar and a muffin tin will outperform a drawer full of single-use bags, and that’s the part worth doing first.
— Damien
Plastic-free freezer tools that make this easier
Once the habits are in place, the right containers make them stick; for practical workflow and storage organisation tips for building a freezer stash, see how to build a freezer stash without the stress. Plastic Free Resealable Food Storage Bags are built for exactly the marinated portions and flash-frozen fruit pieces covered above, letting you press air out by hand before sealing, then reuse the same bag dozens of times rather than binning it after one go.
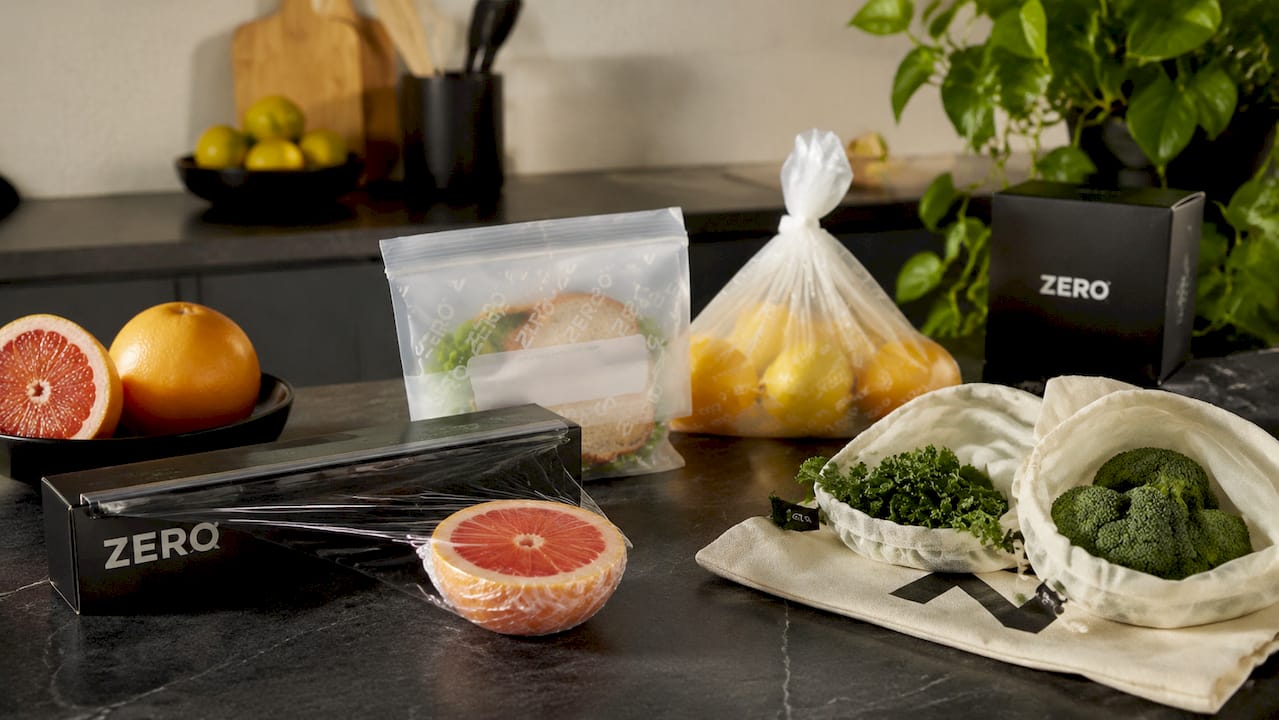
For covering dishes before they go into the freezer, or wrapping bread once it’s sliced, Plastic-Free Cling Wrap is compostable and free of the microplastics that turn up in ordinary cling film, so you’re not trading one contamination risk for another. If you’re doing a big fruit-prep session for flash-freezing, Plastic Free Produce Bags (2 Pack) hold bulk berries or chopped fruit on the tray stage before everything gets transferred into jars, and they hold up to repeated washing far better than a supermarket bag ever will. Browse the full range of resealable storage bags and pick whichever size matches how you actually cook, then build the habit from there.
Sources
- How to Freeze Food Without Using Plastic | Zero‑Waste Chef
- How to prevent freezer burn: 6 tips for proper food storage | MasterClass
- Expert‑approved non‑toxic food storage containers | EatingWell
Share:
Antibacterial vs Disinfectant Wipes: Label Rules for Australian Homes
Flushable wipes in Australia: lab tests show most stay intact 48 hours