The best plastic-free freezer storage options are tempered or borosilicate glass jars and containers, stainless-steel boxes, and food-grade silicone bags. For short-term dry items, beeswax wraps and unbleached parchment work well. Three rules apply regardless of which material you choose:

  • Airtight seal: remove as much air as possible before freezing. Experts at Liebherr confirm that the seal matters more than the material when it comes to preventing freezer burn.
  • Headspace for liquids: leave 2–3 cm of space at the top of any jar or container holding liquid, so expansion doesn’t crack the vessel.
  • Label and portion: write the contents, date, and portion size on every container before it goes in. First in, first out.

Only use containers explicitly labelled freezer-safe. For glass, that means tempered or borosilicate construction. Food Standards Australia New Zealand (FSANZ) guidance underpins the storage-time windows and thawing practices covered later in this guide.

Pro Tip: *Before you buy anything, audit your freezer. Most households need three glass sizes (250 ml, 500 ml, 1 litre), two silicone bags, one stainless-steel container, and a roll of parchment.


Key takeaways

Plastic-free freezer storage works reliably when you combine the right material with an airtight seal, correct headspace for liquids, and consistent labelling for rotation.

Point Details
Seal beats material Airtight closure prevents freezer burn more than any container type; prioritise seal quality above all else.
Headspace for liquids Leave 2–3 cm at the top of any jar or container holding liquid to allow for expansion during freezing.
Label every container Write contents, freeze date, and portion size on every item; practise first-in, first-out rotation.
Starter kit essentials Begin with 2–3 glass sizes, 2 silicone bags, 1 stainless-steel container, parchment, and a cling film alternative.
The Zero Store Resealable bags, produce bags, and plastic-free cling film are available with Australian delivery and full material certifications.

Table of Contents

Which materials work best for plastic-free freezer storage?

Choosing the right material comes down to what you’re freezing and for how long. Each option has a genuine sweet spot, and a few real limits.

Glass (tempered or borosilicate)

Tempered and borosilicate glass are the go-to for long-term storage of soups, sauces, stocks, and cooked meals. Glass is non-porous, so it doesn’t absorb odours or stain, and many containers go straight from freezer to oven or microwave. Martha Stewart’s food-storage guide recommends only using glass explicitly labelled freezer-safe to reduce cracking risk, and straight-sided jars over curved ones because they release frozen contents more easily.

The catch: glass is heavy, breakable, and needs headspace for liquids. Cool food fully before it goes in, and don’t tighten the lid until the contents are frozen solid.

Stainless steel

Stainless-steel containers are excellent for raw meat, large batch portions, and anything you want to stack without worrying about breakage. They’re durable, rust-resistant, and last decades. The downside is opacity: you can’t see what’s inside, so labelling isn’t optional, it’s the whole system. Look for containers with silicone-sealed lids for a genuinely airtight close.

Food-grade silicone

Silicone bags and moulds are flexible, compact, and particularly useful for liquids, sauces, and formed shapes like herb cubes. They compress around their contents, which makes air removal straightforward. Check the zipper or seal quality before buying: a weak seal defeats the purpose. Silicone is technically not a petroleum-based plastic, though it is a synthetic material. As Modern Milkman’s freezing guide notes, silicone bags are dishwasher-safe and durable, but sharp utensils can breach the material, so use wooden or silicone tools when scooping.

Beeswax wraps and waxed paper

Beeswax wraps are ideal for bread, hard cheese, and short-term dry freezer items. They’re not suitable for raw meat or anything wet and long-term: the wax coating can’t form a truly airtight seal around liquid-rich foods. Sweet Peas and Saffron’s plastic-free freezer guide confirms beeswax wraps work well for short-term dry use but recommends pairing them with a rigid outer container for anything that needs longer protection.

Aluminium foil and parchment

Heavy-duty aluminium foil provides a reasonable moisture barrier for meat and bread when wrapped tightly in multiple layers. Parchment is better used as a liner or separator inside a rigid container than as a standalone wrap. Neither is ideal for acidic foods: tomato-based sauces can react with foil over time, causing off-flavours.

Buying checklist for Australian shoppers:

  • Look for freezer-safe on the label, not just food-safe
  • Check whether the container is oven-safe if you plan to reheat from frozen
  • Confirm Australian delivery is available before ordering online
  • For glass, straight sides and wide mouths make filling and cleaning easier

Peer-reviewed research on microplastics in food systems is still developing, but the precautionary case for inert materials like glass and stainless steel is coherent. Mayo Clinic’s guidance on BPA adds a practical note: avoid heating food in plastic containers, and prefer glass or stainless steel where possible.


How do you prevent freezer burn without plastic?

Freezer burn is dehydration. When air reaches the surface of frozen food, moisture escapes and oxidation follows, leaving grey, leathery patches and off-flavours. The material of your container matters far less than how airtight the seal is, a point Liebherr’s freezing guide makes clearly.

Here’s how to get a reliable seal with non-plastic options:

  1. Water displacement for silicone bags: submerge the filled bag in a bowl of water up to the seal line. The water pressure pushes air out. Seal while still submerged.
  2. Press-and-roll for wraps: lay the wrap flat, press out air from the centre outward, then roll the edges tightly under the food.
  3. Partial freeze-and-tighten for glass jars: leave the lid loose until the contents are partially frozen (about 1 hour), then tighten. This prevents pressure build-up from expansion and reduces cracking risk.
  4. Vacuum pump for rigid containers: a hand-pump vacuum lid (available at most Australian kitchenware stores) removes residual air from glass or stainless-steel containers with compatible lids.
  5. Cool before freezing: putting warm food directly into the freezer raises the internal temperature, creates condensation, and accelerates ice-crystal formation. Cool to room temperature first, then refrigerate briefly if possible.

Leave at least 2–3 cm at the top of any jar or container. For glass specifically, never fill to the brim, and use straight-sided jars rather than jars with a narrow neck, which can crack as the contents expand upward.

Safety note for glass: thermal shock is the main cracking risk. Don’t move glass directly from freezer to a hot oven or boiling water. Let it thaw in the fridge or at room temperature first, unless the container is explicitly rated for that transition.

Pro Tip: Flash-freeze individual pieces on a lined baking tray for 1–2 hours before transferring to a container. Berries, dumplings, meatballs, and sliced banana all freeze separately this way, so you can grab exactly what you need without the whole batch welding together. It also means you need less packaging overall.


How to freeze everyday foods without plastic, step by step

Different foods need slightly different handling. Here’s what works for the most common items in an Australian household freezer.

Meat and raw proteins

  1. Portion into single-serve or meal-sized amounts before freezing.
  2. Lay each portion on a sheet of unbleached parchment, fold over to cover, and place in a stainless-steel container or freezer-safe glass dish with a lid.
  3. Label with the cut, weight, and date.
  4. Freeze flat so portions stack neatly and thaw evenly.

Stock and broth

  1. Cool completely in the fridge (at least 4 hours, or overnight).
  2. Pour into straight-sided, freezer-safe glass jars, leaving 2–3 cm headspace.
  3. Leave lids loose until contents are frozen solid, then tighten.
  4. Alternatively, freeze in silicone ice-cube trays, then decant the cubes into a lidded glass jar for long-term storage.

Casseroles and lasagnes

  • Use a metal baking dish with a tight-fitting lid, or an ovenproof glass dish.
  • Cover the surface with a sheet of plastic-free cling film or parchment pressed directly onto the food before adding the lid, to prevent surface drying.
  • Cool fully before freezing. Label the dish with contents and date.

Sauces and soups

Choose shallow containers over deep ones. Shallow glass containers freeze faster, which reduces ice-crystal formation and limits quality loss. Leave headspace, cool first, and freeze flat where possible.

Herbs and small portions

  • Fill stainless-steel ice-cube trays or silicone moulds with chopped herbs and a little water or olive oil.
  • Once frozen solid, pop the cubes into a labelled glass jar with a lid. One cube typically equals one tablespoon.

Fruit and bread

  1. Flash-freeze on a parchment-lined tray until solid (1–2 hours).
  2. Transfer to a rigid glass or stainless-steel container.
  3. For bread, wrap slices in parchment, then place in a container or a reusable produce bag as an outer layer for short-term freezing.

How do you organise a plastic-free freezer efficiently?

The biggest practical barrier to ditching single-use bags isn’t the cost of new containers. It’s the loss of the grab-and-go convenience that a bag of frozen peas or a zip-lock of mince provides. Good organisation solves that.

  • Use shallow, stackable containers and always label both the face and the lid. When containers are stacked, the lid label is the only thing visible.
  • Adopt a shelf-by-use system: proteins on the bottom shelf (heaviest, least frequently accessed), meal-prep and batch-cooked dishes on the middle shelf, and fruit, veg, and quick-grab breakfasts at the top or in the door.
  • Freeze flat wherever possible. Silicone bags of sauce or soup freeze flat on a tray, then stand upright like files in a drawer once solid. This saves significant space and makes retrieval fast.
  • Use trays and dividers to create zones and stop containers migrating. A simple wire rack or a storage basket system keeps categories visible and prevents rummaging.
  • Label everything with contents, date, and portion count. A wax pencil on glass wipes off cleanly; freezer tape and a permanent marker work on stainless steel and silicone.

Pro Tip: Keep a small dedicated tray or box at the front of the freezer for single-serve items: one portion of soup, a breakfast smoothie pack, a slice of banana bread. It functions like a “grab-and-go” zone and stops you digging through the whole freezer at 7 AM.

Practical zero-waste freezing guides consistently flag that organisation is what makes the habit stick long-term. Solve the convenience problem and the rest follows.


What are the safe thawing and storage times for frozen food in Australia?

Freezing stops bacterial growth but doesn’t eliminate bacteria already present. Safe thawing and reheating practices matter as much as how you freeze.

Best thawing methods:

  • Fridge overnight: the safest method for meat, fish, and cooked meals. Keep food below 5°C throughout. FSANZ guidance recommends this as the default approach for perishable items.
  • Cold-water bath: place the sealed container in cold water, changing the water every 30 minutes. Only use this method when the container is fully sealed and waterproof.
  • Stovetop or oven from frozen: suitable for stews, casseroles, and soups. Reheat until piping hot throughout (above 75°C internal temperature) before serving.

Never thaw meat on the bench at room temperature. The outer layers enter the temperature danger zone (5°C–60°C) long before the centre thaws.

Suggested quality-focused storage windows (aligned to conservative FSANZ-style guidance):

  • Soups and stocks: up to 3 months
  • Cooked casseroles and stews: up to 3 months
  • Raw meat (beef, lamb, pork): up to 4–6 months
  • Raw fish and seafood: up to 3 months
  • Blanched vegetables: up to 12 months
  • Fruit (flash-frozen): up to 12 months
  • Cooked grains and legumes: up to 3 months
  • Bread: up to 3 months

These are quality windows, not safety deadlines. Food kept consistently at or below minus 18°C remains safe indefinitely, but texture and flavour decline over time.

Critical safety rules:

  • Never refreeze thawed raw meat unless it has been fully cooked first.
  • Label every container with the freeze date and practise first-in, first-out rotation.
  • Reheat cooked food once only. Repeated heating and cooling cycles increase bacterial risk.

The EPA’s plastics data provides useful context for why reducing single-use plastic in the kitchen matters at a household level: the cumulative effect of individual choices on plastic waste streams is significant, even when each decision feels small.


What plastic-free freezer products can you buy in Australia?

A practical starter kit doesn’t require a complete kitchen overhaul. Start with a few versatile pieces and build from there.

The Zero Store picks for Australian households:

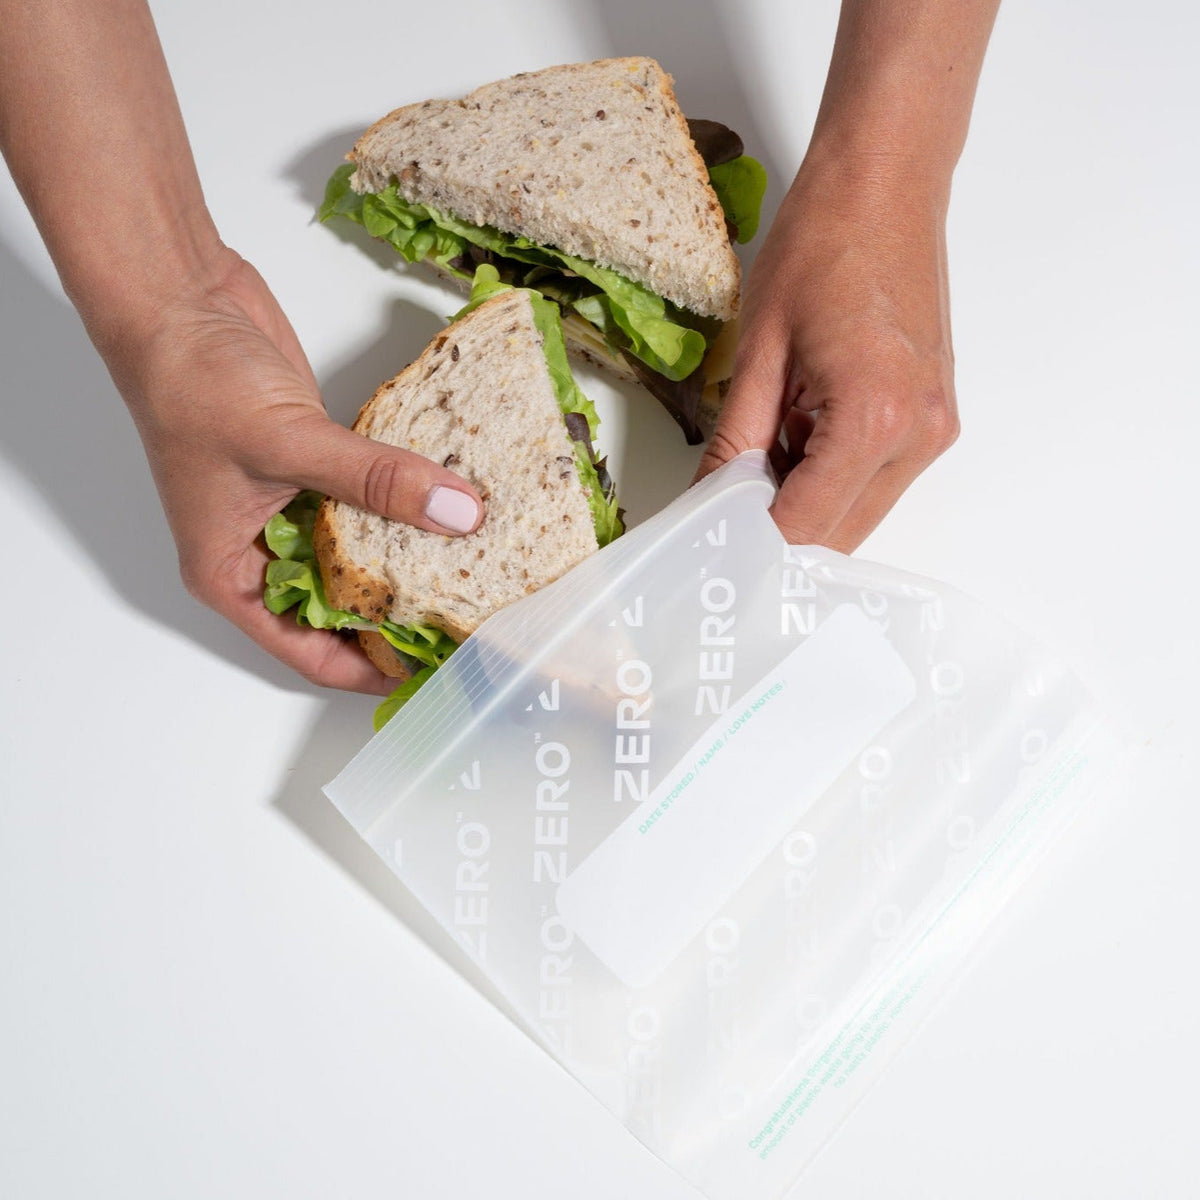
  • Resealable food storage bags: made from bio-polymers (PLA and PBAT), these are the closest like-for-like replacement for conventional zip-lock bags. Use them for portioned meat, fruit, herbs, and anything you’d normally reach for a plastic bag to handle. They seal firmly, freeze flat, and are home-compostable.
  • Plastic-free produce bags: useful for organising fruit and vegetables before freezing, and as a protective outer layer for bread or baked goods. Lightweight and reusable.
  • Plastic-free cling film: a biodegradable alternative to conventional cling film, made without microplastics. Use it to cover dishes before the lid goes on, wrap bread before it goes into a container, or seal the surface of a casserole dish. 30 metres per roll.

Suggested starter kit for an Australian household:

  • 2–3 glass jar sizes (250 ml, 500 ml, 1 litre) with straight sides and wide mouths
  • 2 food-grade silicone bags (one small, one medium)
  • 1 stainless-steel container with a sealed lid
  • 1 roll of unbleached parchment
  • 1 roll of plastic-free cling film

For more on how bio-polymer materials like PLA compare to conventional plastic in food storage, The Zero Store’s guide to what PLA is covers the material science in plain language.

Buyer’s checklist:

  • Confirm freezer-safe labelling on any glass or rigid container
  • Check material specifications: food-grade silicone, borosilicate or tempered glass, 304-grade stainless steel
  • Verify Australian delivery and return policy before ordering
  • For The Zero Store products, certifications and material specs are listed on each product page

Pro Tip: Buy the resealable bags first. They’re the most direct replacement for the single-use plastic bags most households use daily, and they make the transition feel immediate rather than gradual.

For a broader look at eco-friendly alternatives to zip-lock bags, The Zero Store’s blog covers the options in detail.

Resealable Food Storage Bags


Plastic-Free Cling Wrap

How do you clean and maintain plastic-free freezer containers?

Proper care extends the life of glass, stainless steel, silicone, and wraps significantly. Most of these materials last years, sometimes decades, with straightforward maintenance.

  • Glass: dishwasher-safe in most cases, but check the lid separately. For stubborn residues, fill with hot water and a tablespoon of bicarbonate of soda and leave for 30 minutes before washing. Lemon juice or white vinegar removes mineral deposits and light staining.
  • Stainless steel: hand-wash with warm soapy water or dishwasher (check lid and seal compatibility). For odours, a paste of bicarbonate of soda and water left for 15 minutes works well. Avoid steel wool or abrasive pads, which scratch the surface and create crevices where bacteria can accumulate.
  • Silicone bags and moulds: dishwasher-safe on the top rack. Turn bags inside out to wash thoroughly. For oily residues, a hot soak with a few drops of dish soap breaks down fat more effectively than a cold rinse. Avoid sharp utensils when scooping food out.
  • Beeswax wraps: hand-wash only in cool water with a small amount of mild soap. Hot water melts the wax coating. Air-dry flat. Replace when the wrap becomes thin, cracked, or no longer holds its shape around food.
  • Seals and lids: dry lids and silicone seals completely before storing. Trapped moisture in a folded seal is where mould starts. Check seals every few months for cracks or deformation, and replace them when they no longer create a firm close.

Pro Tip: Keep a wax pencil and a roll of freezer tape in a small cup on top of the freezer. When labelling takes two seconds, you actually do it every time. When you have to hunt for a marker, you skip it, and that’s when things get lost for six months.


Why durable, repairable solutions suit Australian kitchens best

There’s a version of plastic-free freezer storage that looks great on social media and falls apart in a real kitchen within three months: mismatched glass jars that don’t stack, silicone bags with seals that split after a dozen washes, beeswax wraps used for everything including raw chicken (don’t). The gap between aspirational sustainability and practical sustainability is almost always an organisation problem, not a motivation problem.

What actually works in Australian households is a small, well-chosen set of durable containers that fit the freezer shelf dimensions you actually have, paired with a cling film alternative for the awkward shapes that don’t fit neatly into anything. The Zero Store’s approach, making material specifications and certifications visible on every product page, matters here because “plastic-free” on a label can mean almost anything. Knowing whether a bag is PLA, PBAT, or food-grade silicone tells you how to use it, how to clean it, and what to do with it at end of life.

The other thing worth saying plainly: the switch doesn’t need to happen all at once. Replace single-use bags first, because that’s where most households generate the most freezer plastic. Add glass containers as old plastic ones wear out. The environmental case for reducing plastic in the kitchen is well-supported, but the practical case is just as strong: glass and stainless steel don’t absorb odours, don’t stain, and don’t need replacing every year.


Stock your plastic-free freezer from The Zero Store

Resealable Food Storage Bags

The Zero Store is an Australian-owned, direct-to-consumer platform built around one goal: replacing single-use plastic in everyday household use with materials that are biodegradable, compostable, and genuinely functional. For freezer use specifically, the resealable food storage bags are the most direct replacement for conventional zip-lock bags, made from PLA and PBAT bio-polymers, certified compostable, and available with Australian delivery. The plastic-free cling film covers dishes, wraps bread, and seals casseroles without microplastics. Material specifications, certifications, and FAQs are listed on every product page, so you know exactly what you’re buying. Browse the full range at The Zero Store and order with confidence: Australian delivery, transparent product specs, and no single-use plastic in the packaging.


Sources

The following references informed this guide and are worth bookmarking for deeper technical detail:

Latest Stories

This section doesn’t currently include any content. Add content to this section using the sidebar.